Showing posts with label crafts | DIY projects. Show all posts

Wednesday, September 16, 2015

Sweet Dreams, Printable Hand Lettered Artwork


New on my website - hand lettered printable wall art! 
Great for a kids room or nursery. Just print and frame, or color it first then frame! 

Click here for details.

Sunday, May 31, 2015

Under the Sea Fill-In-The-Blank Invitations

Introducing the latest addition to my line of printable stationery, under the sea invitations - just in time for your upcoming summer parties! I'll soon add a template of this design to my Zazzle shop where you'll be able to customize them on-screen and purchase them already printed. Until then, you can print as many as you need for one low price, when you purchase this print-at-home PDF download from my website. The invitations measure 5"x7" and fit perfectly into A7 (5.25"x7.25") envelopes.

~ Dio
Like my blog? Please vote for me at Top Mommy Blogs.com! It only takes 1 second.

Monday, May 11, 2015

Hand Lettering: Live, Love, Sparkle

So now that I've been practicing my hand lettering for a while and becoming more confident in my abilities, I decided to try something new. I found a few plain ceramic mugs at a good price, I  thought "oh, what the heck..." bought some ceramic markers* and came home eager to try my lettering on a new medium. Part of me was a little nervous about possibly ruining a perfectly plain coffee mug, but I figured #1) it wasn't a huge investment, and #2) I can always use them as planters or donate them to Angel View. 

Well, to my surprise, I really like they way they turned out! I especially love the metallic inks, they really add a nice accent to my designs. Above is one of the cups I've decorated. I think this one might become my daily companion at the office. Don't be surprised if you start seeing a few of these in my Etsy shop or website. Once I get started on something, it's hard to stop, and I don't have enough cabinet space to store them all! 


~ Dio
*Please see affiliate links disclosure on sidebar.
Like my blog? Please vote for me at Top Mommy Blogs.com! It only takes 1 second.

Sunday, December 14, 2014

I know a lot of nice people...well, kind of.

Making tags for my coworkers' gifts today. Apparently Santa had to lower his standards in order to include them in his nice list this year - ha!

I didn't have time to bake anything but they all love treats. Well, don't we all? I bought cute decorated bags and filled them with store bought biscotti and Kona coffee k-cups. Coffee is brewed daily in our office, free of charge of course. However, if we want to use the Keurig, we have to buy our own pods.  Given that our office coffee tends to be bitter at times (or too strong, or too weak), I'm sure they'll be quite happy to get their k-cups.

Making the Tags
If want to make your own tags, here's what you'll need:
• 60-100 lb card stock*
• Ribbon, string or twine* to tie them on to the goodie bags


First I punched out the tags, then I doodled away. Since I was in a bit of a rush, I went went with the easiest thing to draw. A Christmas tree with stars. It's also fun to make tags out of scrap paper and recycled packaging. I'll share some of those soon. Happy crafting!

*Please see affiliate links disclosure on right column. 
Like my blog? Please vote for me at Top Mommy Blogs.com! It only takes 1 second.

Wednesday, December 10, 2014

Recycled Wine Corks Holiday Wreath

Came home from work today feeling crafty, so I pulled out a bunch of corks from my stash and made a Christmas wreath - yay me!
Here's a glimpse of the creative stages. I'm letting this baby dry overnight, then tomorrow I'll finish it up with a nice big bow and hang it on my door. Will share pictures of the final product, promise!

In case you too are feeling crafty and happen to be looking for some wine corks to work with, you've come to the right place. I have more corks than I can ever use, so I've listed a few hundred for sale on my website. Check it out - while supplies last. http://bit.ly/1ynM3fU


Like my blog? Please vote for me at Top Mommy Blogs.com! It only takes 1 second.

Wednesday, July 2, 2014

DIY Glass Marble Magnets or Pushpins

I have this cute set of 6 glass marbles ready to be turned into magnets or push pins. It's the perfect quick and easy DIY project that anybody can tackle in just a few minutes. All you need is  bit of E-6000 glue or a hot glue gun to attach 1/2 inch magnets (or pushpins) to the back and viola! All done. ~ Marbles measure approximately 3/4 of an inch. They make a great homemade gift, perfect for the home or office!

I have a few other sets for sale on my Etsy shop, but this is such a small set, it's more affordable for you and I if they sell through my blog rather than Etsy. (Trying to avoid the added Etsy transaction fees). 

Buy now - Only $4.99 + Free Shipping anywhere in the U.S.


Ships via USPS within 1-2 business days from Palm Desert, California. Listing will be removed once item is purchased.

You will receive an e-mail notification within a couple hours after purchase informing you that payment was received and your purchase will be processed.  


Like my blog? Please vote for me at Top Mommy Blogs.com! It only takes 1 second.

Friday, June 27, 2014

Graphite Brocade Paper Strips, $4.99 & Free Shipping

Summer is here but Spring cleaning is still going on at my place. I have come to the realization that my full time job doesn't allow me to craft as much as I used to, so it's time to find a loving new home for all of my paper and crafting supplies. I will be offering many of them for sale here on the blog and on my Etsy shop.

Today I am listing 6 sheets of metallic grey stock, also known as Graphite Broccade paper by Envelopments. The stock is cut down to strips measuring 1.5x11 inches. Each full sheet retails at $1.48 each, so you are getting a $9.42 value at only $4.99 with free shipping!

Buy today for only $5 plus free shipping!
I don't have whole sheets available. The listing is for a total of 32 strips (the equivalent of 6 letter size sheets) measuring 1.5 x 11 inches. 

But what can you do with these strips? My first option would be to use it for a quick and easy DIY stationery project. All you need is a few sheets of letter-size card stock, double sided tape or a glue stick and scissors. Just cut the blank card stock into fourths (each measuring 4.25x5.5 inches), cut the  brocade paper strip to measure 4.25 inches and attach to the short end of your blank card to create a decorative trip. Then simply pair your decorated stock with colorful envelopes and you're all set!

Here's a quick example I put together in just a few minutes. Other options would be use the stock as a trim for invitations, use it in scrapbooking projects, gift wrapping, use it to wrap votive candle vases,  use it as a bookmark, etc. ~ Get creative and have fun!


Ships via USPS within 1-2 business days from Palm Desert, California. Listing will be removed once item is purchased.
Like my blog? Please vote for me at Top Mommy Blogs.com! It only takes 1 second.

Tuesday, June 17, 2014

Wine Corks for Sale

My husband thought he'd tap into his creative abilities and make a bath mat out of wine corks for our bathroom. "What a great idea!" I thought. As did he. But several weeks went by and there was no bath mat in sight. Months went by, our house started overflowing with wine corks and still no bath mat.
Sigh...so we figured we'd give someone else a chance to get their little hands on these babies and show us what they can do. Because apparently, all my husband was able to do was collect them.
Wine corks are great for making wedding place cards, key chains, succulent planters, trivets, bulletin boards, holiday wreaths and more! If you're interested, visit my website to purchase to purchase. We have 600 wine corks available at this time.


Like my blog? Please vote for me at Top Mommy Blogs.com! It only takes 1 second.

Tuesday, March 26, 2013

Hassle-free DIY Cupcake Flags

So you're a "do-it-yourself" kinda gal who wants to make cupcake flags for an upcoming event BUT you don't want to use the last of the ink on your printer (it's expensive), and you don't want to make a special trip to the craft store to buy double-sided tape, glue sticks or an entire ream of paper. You're also having trouble with that printable file you downloaded from the internet. Don't worry! In this tutorial, I will teach you...

How to make food flags using only 3 items: 
Scissors  |   Toothpicks  |   Bumper Stickers

Yes, you read correctly, bumper stickers.

Instructions
1. Browse my collection of "bumper stickers" at PaisleyInParis.com and make your selection. Each sticker yields 22 food flags. Orders usually ship within 24 hours.


2. When they arrive, cut into strips along the pre-printed trim lines.


3. Fold the strips in half.


4. Peel the stickers, place the toothpick in the center of the crease, close and viola!


Optional: You can cut out a small triangle from the edge of the flags, or keep the straight edge.  They look cute either way. Use them on cheese platters, fruit salads, and cupcakes. These food/cupcake flags are also water resistant, so they won't tear or smudge during the party.


Speaking of fruit, please excuse me while I enjoy a bowl of freshly sliced oranges. Oh, but wait...


Can't have my oranges without Tajin fruit seasoning. Try it - you'll love it too!


Like my blog? Please vote for me at Top Mommy Blogs.com! It only takes 1 second.

Friday, March 8, 2013

Freebie Friday: Floral Printable Gift Tags

Happy Friday my lovelies. In today's post, I'd like to give you a little something "just because." Remember that iPad illustration I shared with you a couple of weeks ago? Well I used it to create these cute little gift tags shown below - just in time for Spring!


These tags are perfect for any occasion. Simply print and cut around the edges or use a large tag-shaped paper punch to make them look more official. They measure 2x3 inches, so make sure you use a paper punch that is slightly smaller. Now, can get I get a "Hooray for Freebie Friday!"?
Gee, thanks!


Like my blog? Please vote for me at Top Mommy Blogs.com! It only takes 1 second.

Saturday, February 11, 2012

Handmade Valentine Magnet Gifts

Time's a ticking and I have yet to come up with a fun Valentine's craft this year. I am not a big fan of sending candy with my daughter to give out at school, simply because it's not healthy. Kids eat so much sugar nowadays. Last year we made the cutest little cards and gave away decorated pencils. Sorry no pictures available. The year before, when my daughter was in kindergarten, we made handmade magnets. They turned out really cute!
Here's what you need to create your own:
  • Black and white 3/4 inch flat glass marbles
  • 1/2 inch round flat magnets
  • Red acrylic paint
  • A small brush to paint hearts on the marbles
  • E-6000 glue
Once you have all the supplies it gets really easy. Simply paint the hearts on the marbles. Let them dry. Put a little glue on the back of the marble and attach the magnet.
You can package them however you want. I had little 3x3 inch cellophane bags in my craft room and 3x3 folded cards that I used. I placed the marble inside the bags. Then, I printed a message on the back of the folded cards and had my daughter sign them. The message read, "Your magnetic smile stole my heart! Happy Valentine's Day!"
Afterwards, we decorated the front of the cards using scrap paper and three different paper punches: 2-inch round scallop, 1-inch round scallop, and a heart shaped paper punch. The inside of the cards was left blank. Once everything card was decorated and signed, I placed part of the clear bags inside the cards and stapled them together.

They were the cutest Valentine gifts in her class!


Like my blog? Please vote for me at
Top Mommy Blogs.com! It only takes 1 second.

Tuesday, June 7, 2011

Scallop Circle Paper Punch for DIY Cupcake Toppers

Somebody recently asked me where I purchased my paper shapers to make cupcake toppers. You'll find them in any of the large craft stores, but if you don't have time to go around town looking for craft supplies, you can buy them at Amazon in a variety of sizes!
If you need a little guidance as to the size of the punch, here are a few tips:
I use the...
They are so easy to use, and you'll get so much out of them. One little tool in a variety of sizes can bring out the creative genius in you!

Like my blog? Please vote for me at
Top Mommy Blogs.com! It only takes 1 second.

Monday, May 30, 2011

Make a Coupon Organizer from a Box in your Pantry

My mom has always been very frugal in her spending and my younger sister inherited those same genes. I have always been cautious with my spending too, always looking for a deal, but I wasn't like my sister where she'd go through the weekly grocery ads and create a shopping plan for the week based on the sales and the coupons she acquired. It wasn't until one day when she put it in perspective for me..."I love printing coupons" she said, "It's like printing money!"
It was then that I became curious and started printing coupons occasionally. I also downloaded a coupon app to my phone and started enjoying savings at Macy's and Borders where they scan the coupons right from my phone. Then I took it a step further. About 3 weeks ago, I started making use of the coupons in the Sunday paper that usually get thrown out at work. I get there Monday mornings and grab the coupon section from the reception desk before heading to my office. The savings have been UNBELIEVABLE! I have saved about 50% in my grocery and personal care items just in these past 3 weeks!
Funny how things come together sometimes. Just last week I saw a coupon on my phone app for 50% Off any 1 item at Borders, so I stopped by the bookstore to see if anything appealed to me. I found a great book that has been teaching me even more money-saving techniques! I'm not done reading it, but so far I love it! It's called The Coupon Mom's Guide to Cutting Your Grocery Bills in Half, by Stephanie Nielsen.

The book also stresses the importance of being organized. I was carrying my clippings in a plastic envelope, separated by paper clips, but as my coupon inventory grew, I knew it was time to invest in a coupon organizer. I saw a few at the store, but I didn't like them. They weren't "stylish" enough for me. With a home office full of paper supplies, I knew there was something I could create myself. Something recycled and more unique than the plastic ones I had seen at the store. I was right!

I conveniently happened to have all the supplies in my home. If you don't have them within reach, don't worry, I have linked the items so that they are available to you with only a few clicks through Amazon.com.

Supplies to Make Your Coupon Organizer
Steps 1-4: Build your accordion box
  • 1) Take the box apart and cut out the flaps on the left and right sides.
  • 2) Cut the white piece of card stock in half so you have two 5.5x8.5 pieces. Fold each of them into an accordion a half inch at a time, using a bone folder.
  • 3) Tape the edges of the accordion and attach them to one side of the box, making sure that the printed side of the box remains on the inside.
  • 4) Repeat the process and attach the second accordion to the other side of the box.
Steps 5-8: Dress up your box
  • 5) Image 5 shows the side view. With the branding print on the inside, the outside of the box looks now looks like a regular brown box with no print.
  • 6) Line the inside of the box with scrapbooking paper. I used green paper on the inside and decorative scrapbooking paper for the inside of the lid. I didn't have ModPodge so I used regular Elmer's glue.
    I left the inside bottom of the box as is, since no one will see it once the coupons are inside. It's also a nice reminder of what the box used to look like before its "extreme makeover."
  • 7) I measured the box and used my paper cutter to cut the scrapbooking paper in two different sizes. One piece was cut to match the size of the front of the box. The other piece to cover the back and outer flap of the box. I left the outside bottom of the box uncovered, for no particular reason other than to save my pretty paper for another project.
  • 8) I attached velcro to the inside of the flap and the front of the box to secure the precious little clippings inside.
Steps 9-10: Inside the Box
I already had 4x6 A-Z tab cards, so I just dropped them in there and began categorizing my coupons. Then I realized, I needed some subcategories, so I created my own dividers out of color card stock using my EK Success punch to create the tabs. I simply punched out the shape out of blue stock and wrote the name of the category I needed to include in my file. I then used my double sided tape to attach the tab onto a rectangular piece of pink card stock, and viola! A new divider tab! So, if you don't have A-Z cards at hand, no worries. You can make your own tab dividers using this same process.

Hope you enjoyed my tutorial! Drop me a note and send me links to your pictures if you decide to give it a try!

Like my blog? Please vote for me at
Top Mommy Blogs.com! It only takes 1 second.

Tuesday, April 26, 2011

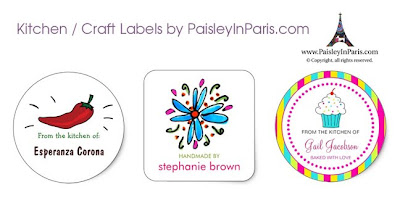
Custom Kitchen & Craft Labels

Handmade by, custom labelsIf you craft professionally or as a hobby, or if you like to give out homemade treats, then you might find my "Handmade by" and "From the Kitchen Of" labels quite useful! Not only will you be able to include a message that best defines your craft, but you'll also find that these decorative little tags and labels will embellish your packaging and add a special touch that many on the receiving end will enjoy.

Like my blog? Please vote for me at
Top Mommy Blogs.com! It only takes 1 second.

Sunday, January 2, 2011

Free 3.25" Square Envelope Template

Hope you all spent a fabulous New Year weekend! I spent some time with my family on New Year's Eve, then spent New Year's Day in my PJ's cleaning, decluttering and crafting - I loved it!
I made several cards this weekend, including a 3.25" square envelope template for you to enjoy! Just print the file, cut around the edges and fold, or follow these easy steps to create a durable template that you'll be able to use over and over again on a variety of paper stocks.
You'll need: a computer, printer, empty cereal box, scissors & glue stick.
Step 1: Print the 3.25" Square Envelope Template.
Step 2: Glue the printout onto the cover of a cereal box (printed side of the template should face you, glue on the back).
Step 3: Cut around the edges and enjoy!
Note: You can get two small envelopes out of one standard 8.5x11 sheet of paper. Just trace, cut out your shapes, fold the edges towards the center and glue them together.
Get creative! Make envelopes out of newspaper, old maps, scrapbooking paper, magazine pages, gift bags or anything else you can think of. ~ Happy New Year! Enjoy!

Like my blog? Please vote for me at Top Mommy Blogs.com! It only takes 1 second.

Monday, November 29, 2010

Saturday Afternoon Craft Party

The holidays are all about good times with friends and family, and this past Thanksgiving weekend was no exception. I am very thankful for the amazing year that 2010 has been, filled with blessings, family fun, growth and many surprises. There is so much to be thankful for, that a one-time gathering on Thanksgiving Day was just not enough of a celebration for our multiple blessings. So, while everybody shopped for Black Friday deals, I stayed home to clean and prepare my home to welcome my guests for a Saturday afternoon craft party.

The idea of this party was just to enjoy a relaxing afternoon, just us girls, while sipping whine and munching on delicious treats, tackling some fun holiday crafts. It was actually a productive day, but we had so much fun, it didn't even feel like we were working.
My sister, for instance, was able to complete all of her Christmas cards at the party. One of my cousins who was headed to a birthday party after our get-together, was also able to create a card for the occasion. They all left with multiple creations consisting of handcrafted money holders, greeting cards and gift tags. I didn't have much time to craft, as I basically ran back and forth between the craft table and my office bringing out materials for them to use, and I took lots of pictures with my new Olympus E-PL1 camera, which I love! I was very pleased and inspired by their creations, that after they left, I didn't even bother cleaning up right away. I left out the supplies and crafted for about an hour or so myself, before going to bed.

All of the supplies I provided, with the exception of the embellishments (stickers, rhinestones, etc), were left over materials from previous custom invitations orders I had worked on in the last 5 years. I never threw out any scraps, knowing that the smallest piece of paper holds a valuable place in a new design, no matter how big or small. The evidence lies in the image below, where you can see some of the beautiful designs that were created by combining different colors and textured card stocks.
Cheers! To a fun and relaxing Saturday afternoon, in good company!


Like my blog? Please vote for me at
Top Mommy Blogs.com! It only takes 1 second.